
- Clocking In/Out
- Opening
- Creat a New Ticket (for Service)
- Moving Ticket from Waiting to Service
- Checking Out (Service/Products)
- Closing
1. Click or tap on the Time Clock tab (TOP of the screen)
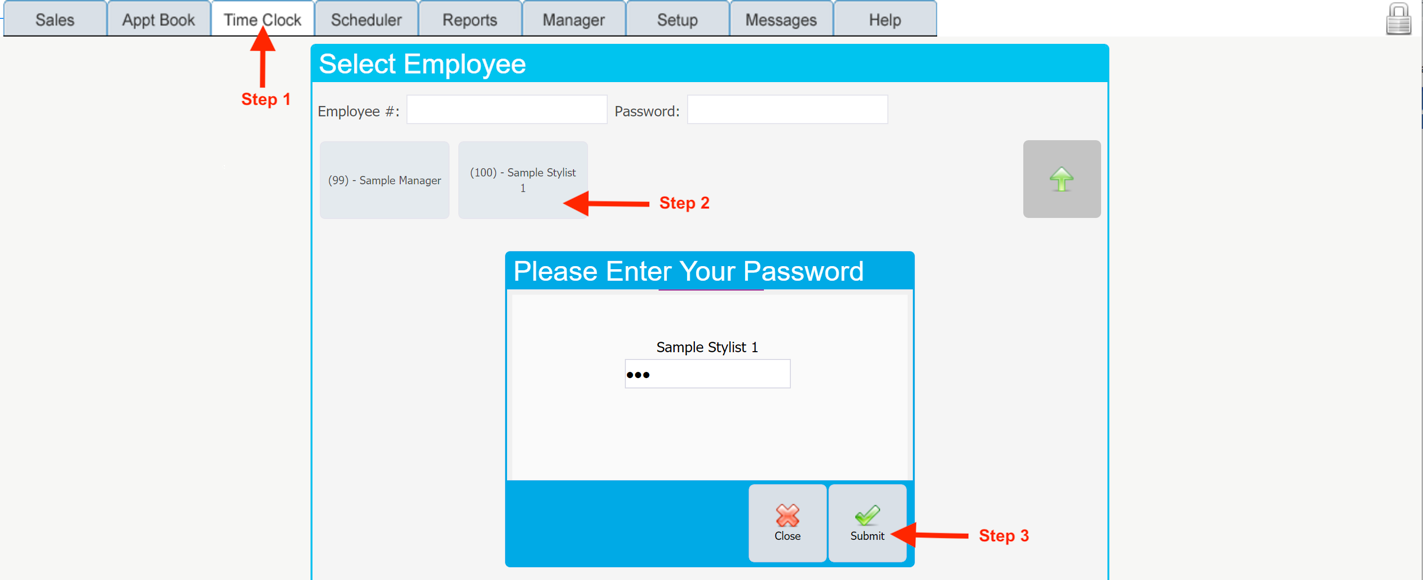
2. Click on your name from the list of employees
3. If asked for password enter your password then click Submit
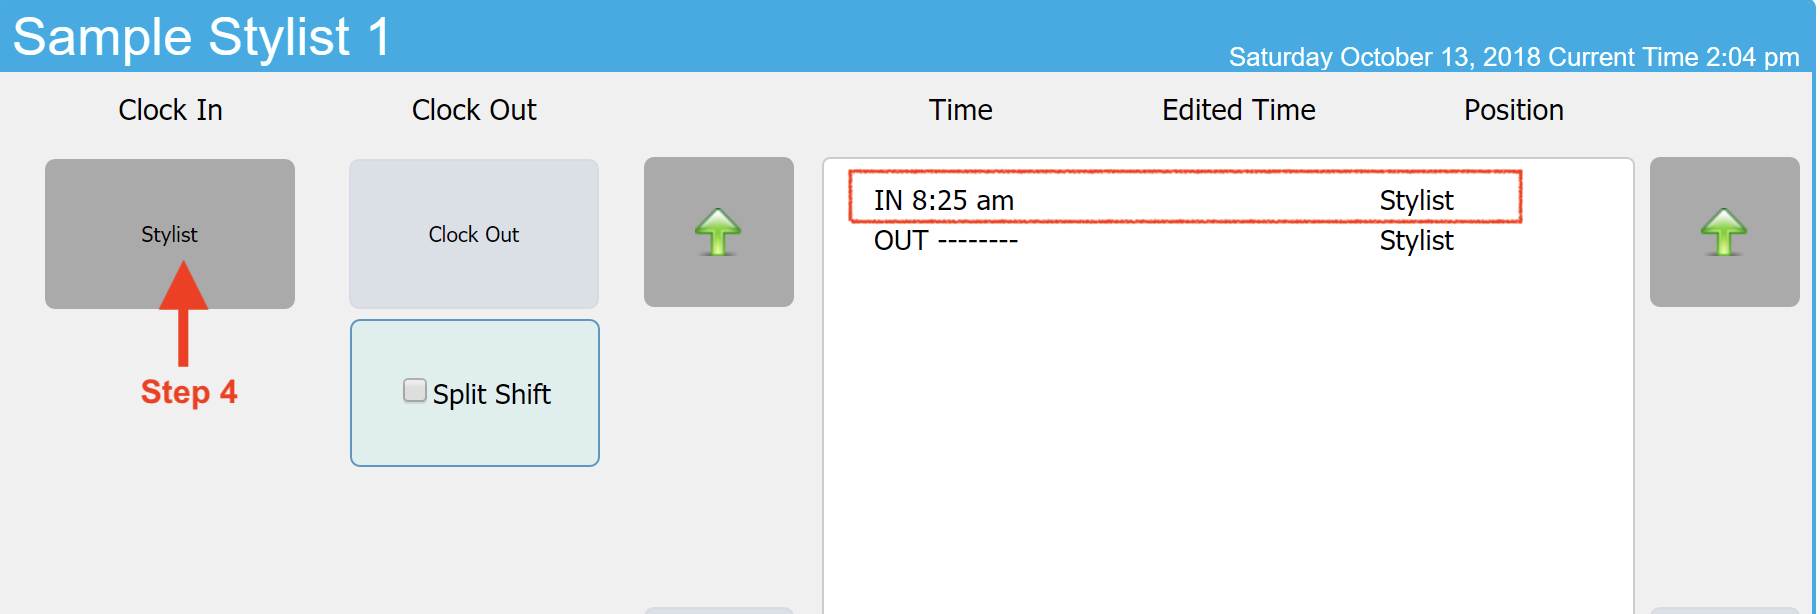
4. You will see the following screen and click on your position, Stylist (in this example) button. Once you do that on the right you will see your clocked in time.
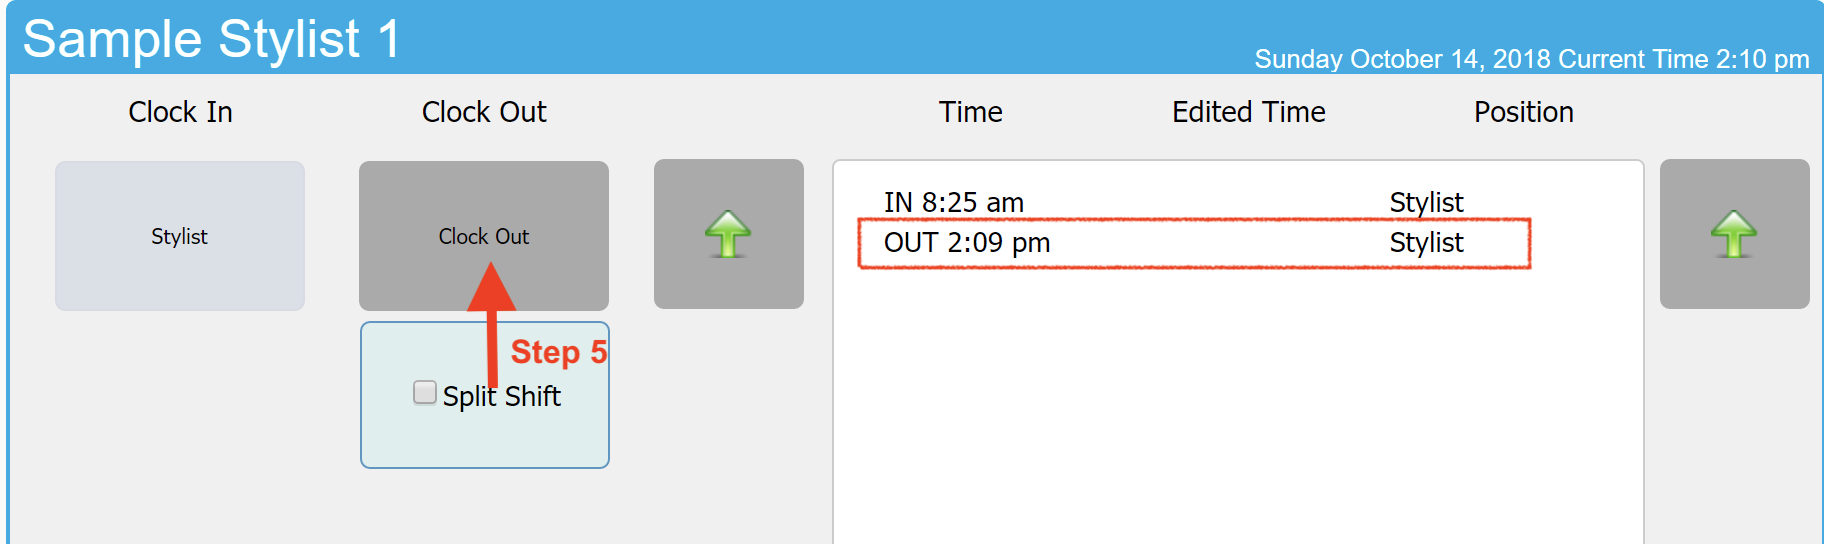
5. Clocking Out – Repeat Step 1, 2, 3 and 4. You will see the below screen and click on Clock Out button. Now on the right you will see your clocked out time.
1. Click on Manager from the top tab
2. Click on Opening from the left menu
3. Open till (cash drawer) by clicking on Open Till button on the bottom of the screen.
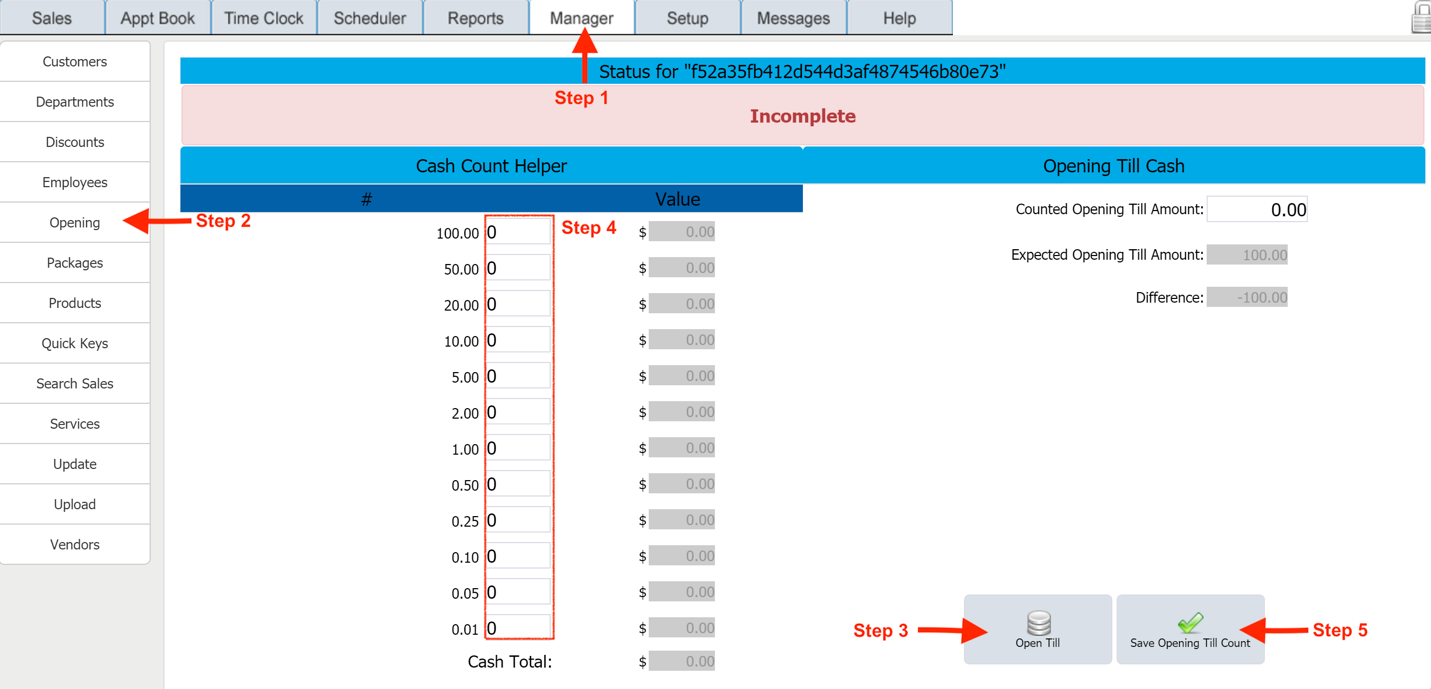
4. Once the Till is open you are ready to count the money. Count each type of bills and coins and enter the counted number (not the $ amount but the number of each type).
5. Click on Save Opening Till Count button to save
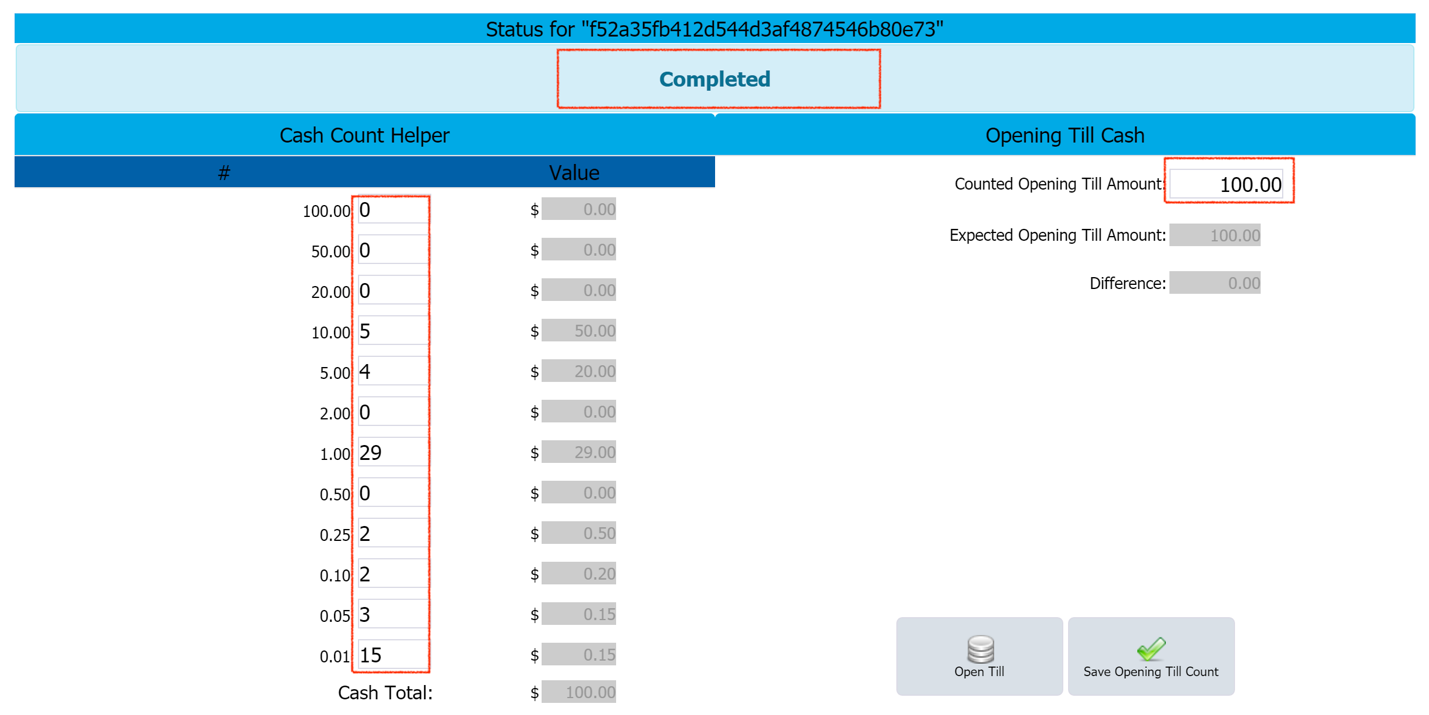
6. If everything done correctly the screen should like above. As the RED box shows the Completed.
NOTE: If the money in the register is lower than the expected Till amount check the previous night’s closing info in the Close Out book. If that does not match let the manager or owner know about.
Create a New Ticket (For Service)
1. Click on New Ticket at the bottom of the screen
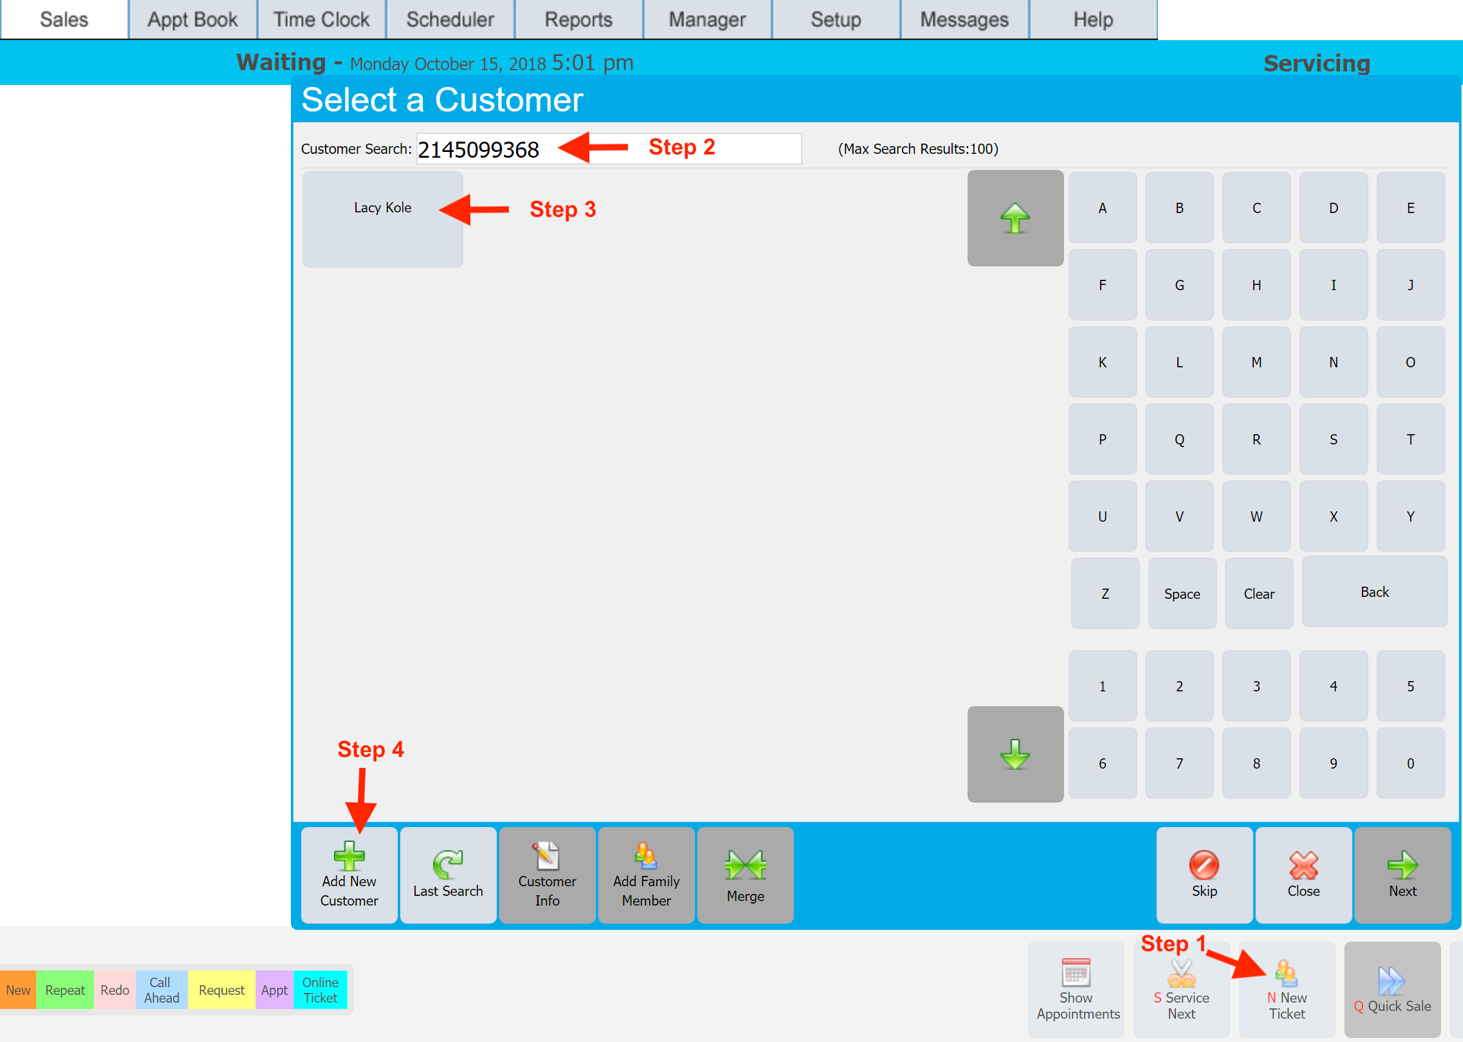
2. Ask the customer for their phone number and enter in the Customer Search white box.
3. If the customer has been at the salon before the Name of the customer will be shown. Ask the customer if that is their name. If yes, select customer name and go to Step 8
4. If the customer’s name doesn’t show up as in Step 3, click on the Add New Customer button at the bottom as shown above.
5. On the New Customer window enter customer’s First Name, Last Name, Phone Number, Email. Click on the Gender button and select Male/Female.
6. Click on the Save and Use button at the bottom of the screen as shown in the next picture.
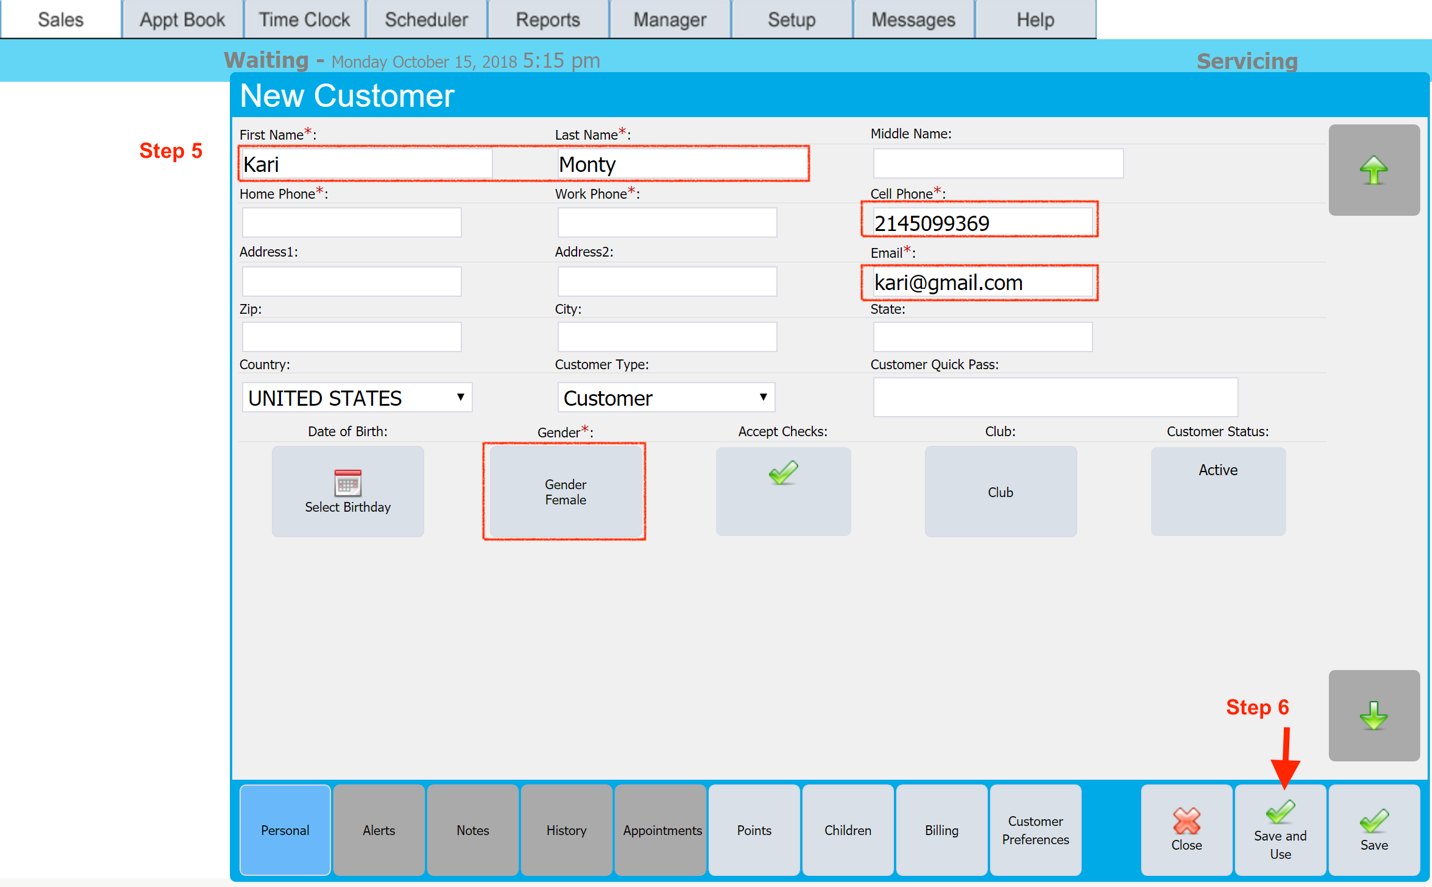
7. Click on the Save and Use button at the bottom of the screen as shown in the next picture.
8. Click on the Select Service button and select the services requested by the customer. Selected services will show up on the right side of the screen as shown below.
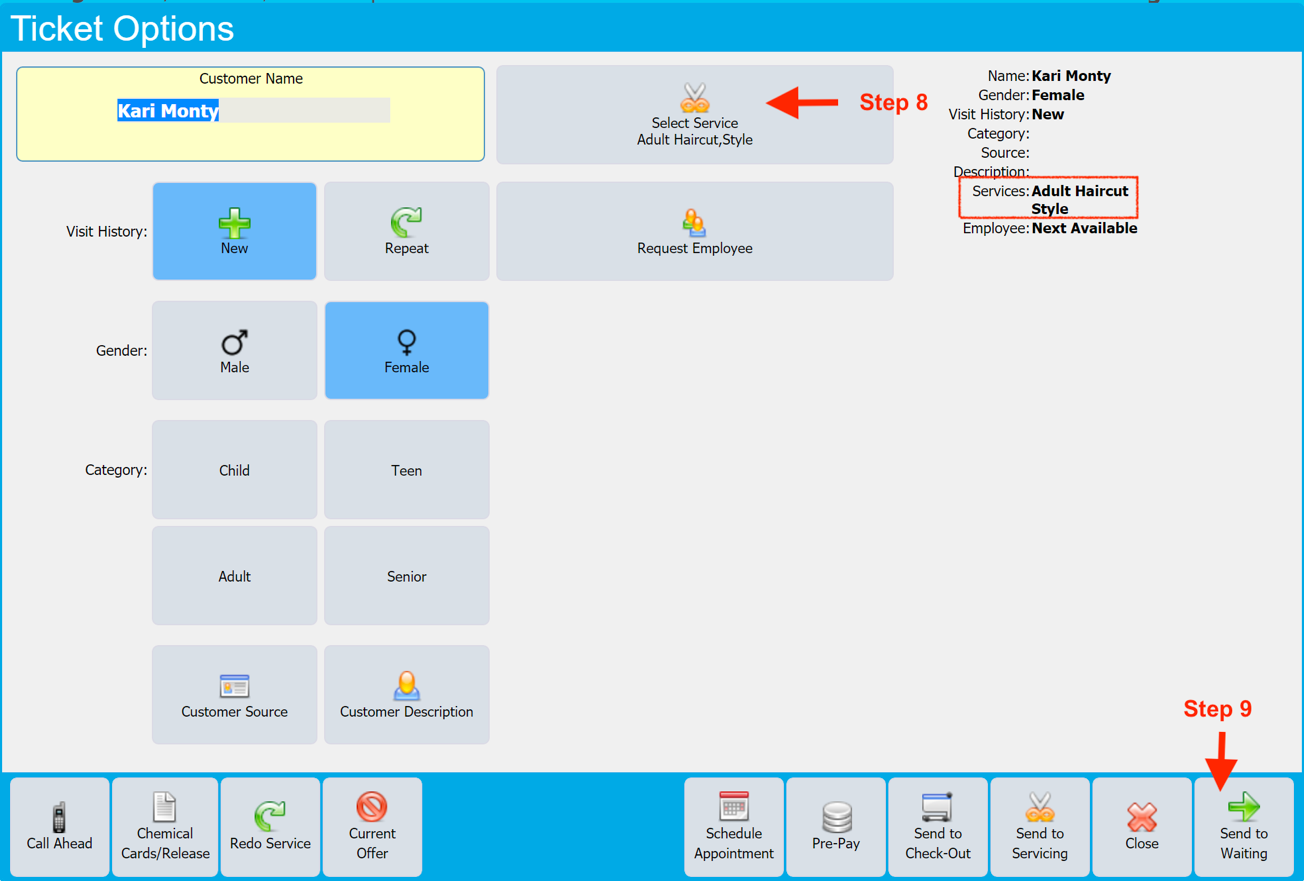
9. Click on Send to Waiting button on the right as shown above.
Moving ticket from Waiting to Servicing (For Service)
1. From the waiting side of the screen, click on the Green Arrow of the customer you want to service.
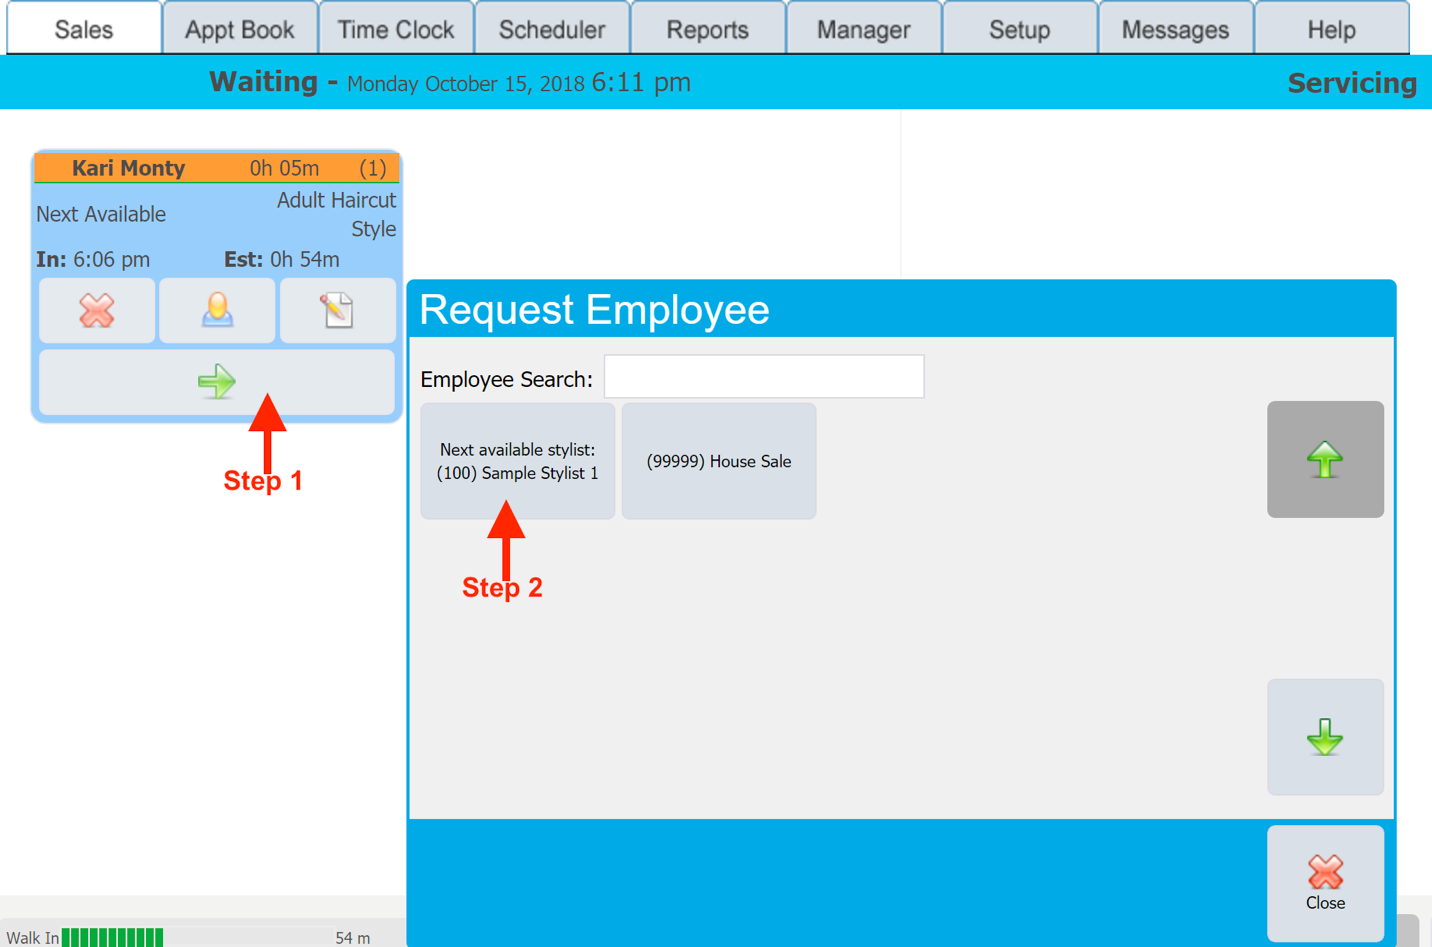
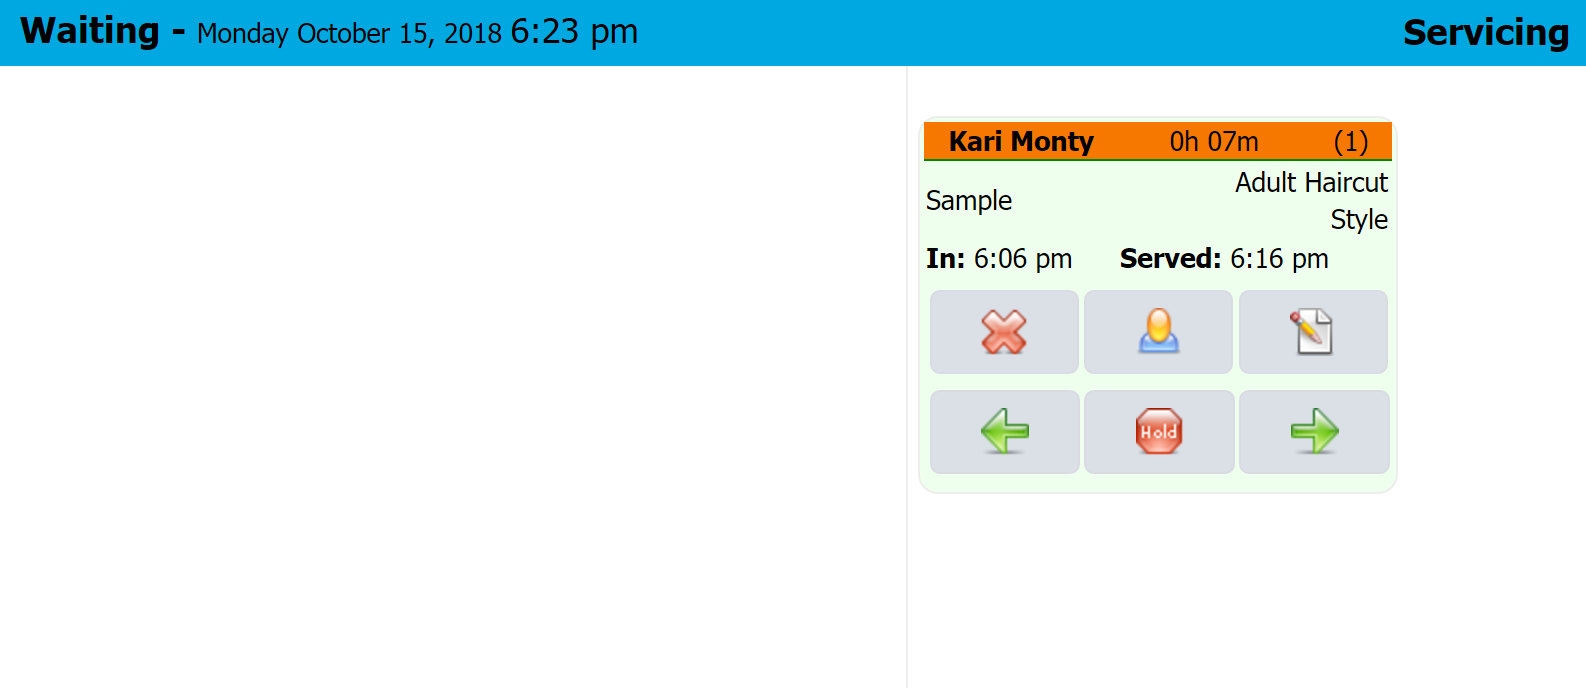
2. In the Request Employee window select the employee that will be servicing. The ticket will now move from Waiting to Servicing side of the window, as shown below
Checking Out (Service/Products)
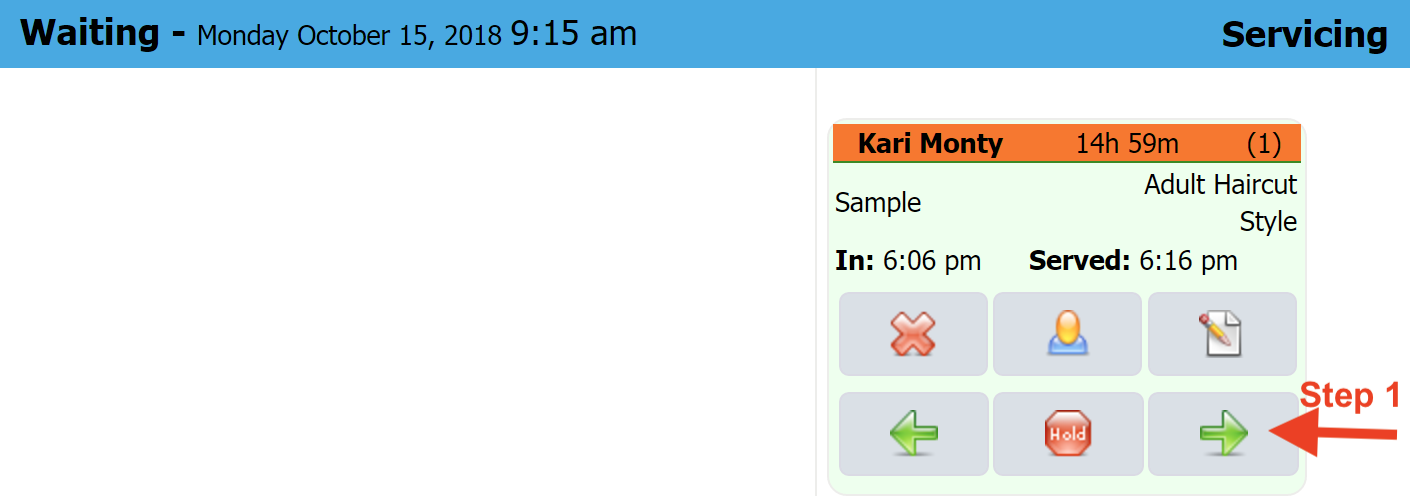
1. From the Servicing side of the screen, click on the RIGHT Green Arrow of the customer you want to check out
2. New window as shown below will be displayed. Look at the right red box section where services originally added when checking in the customer is listed. If anything needs to be removed click on Edit button on the right. If additional services needs to be added click on Service button on the top left.
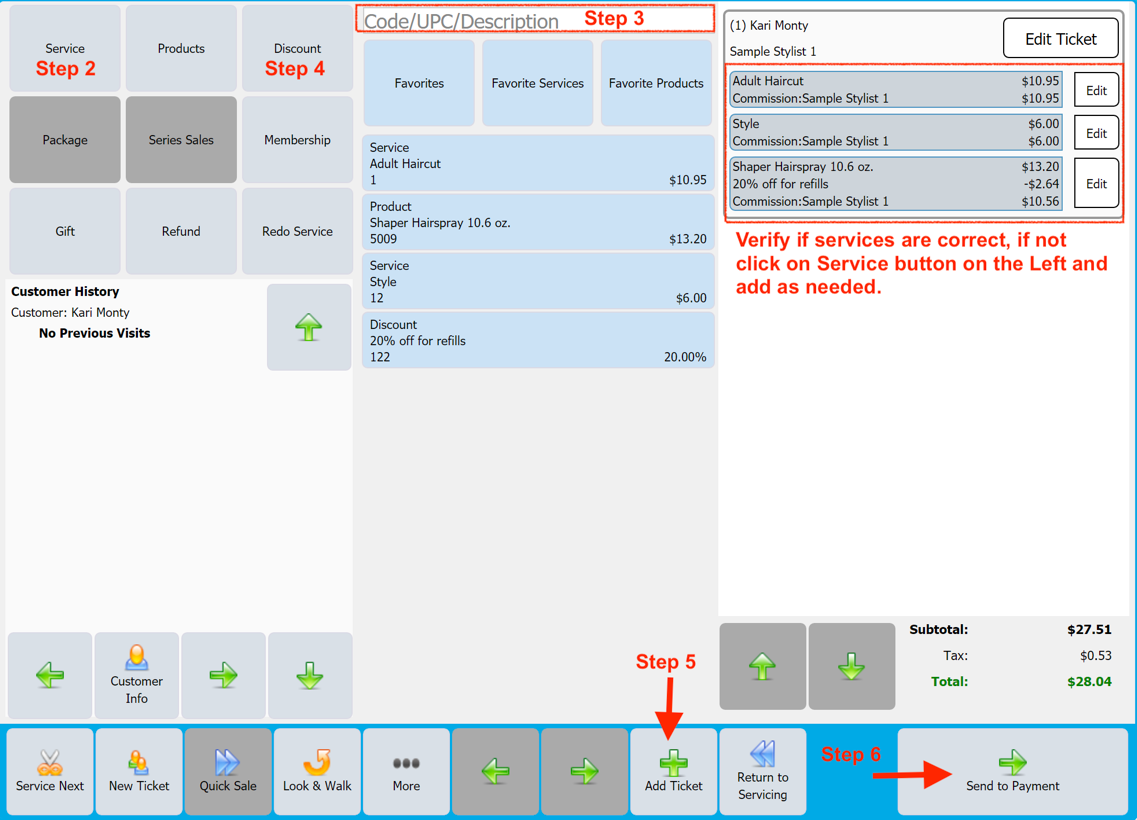
3. Ask the customer if interested in buying any products, if yes scan the products using the bar code scanner or enter the SKU number manually into the box in the middle of the screen as shown above.
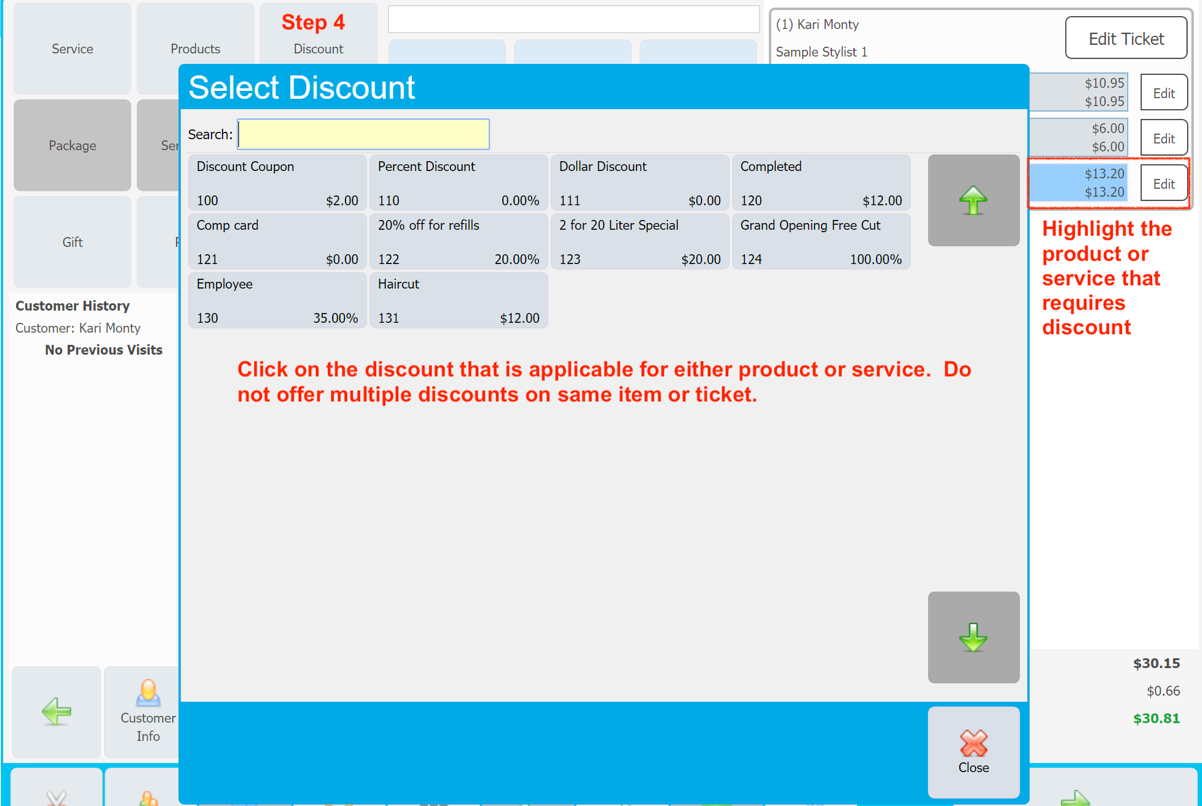
4. For service or products if discount needs to be applied highlight the item from the right of the screen and it will be highlighted in blue. Next click on the Discount button on the top of the screen and the discount screen will pop up. Next select the discount that is applicable. Discount will be shown below the highlighted item on the right.
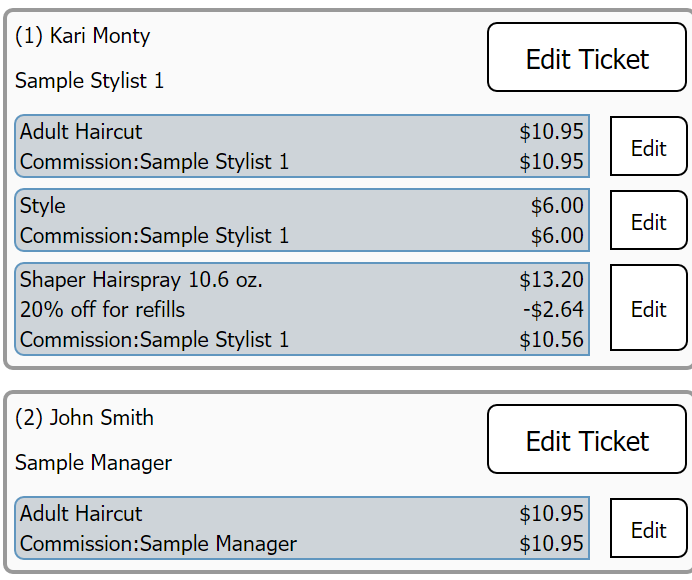
5. If there are multiple tickets need to be combined for one payment click on the Add Ticket button on the bottom of the screen and select the ticket.
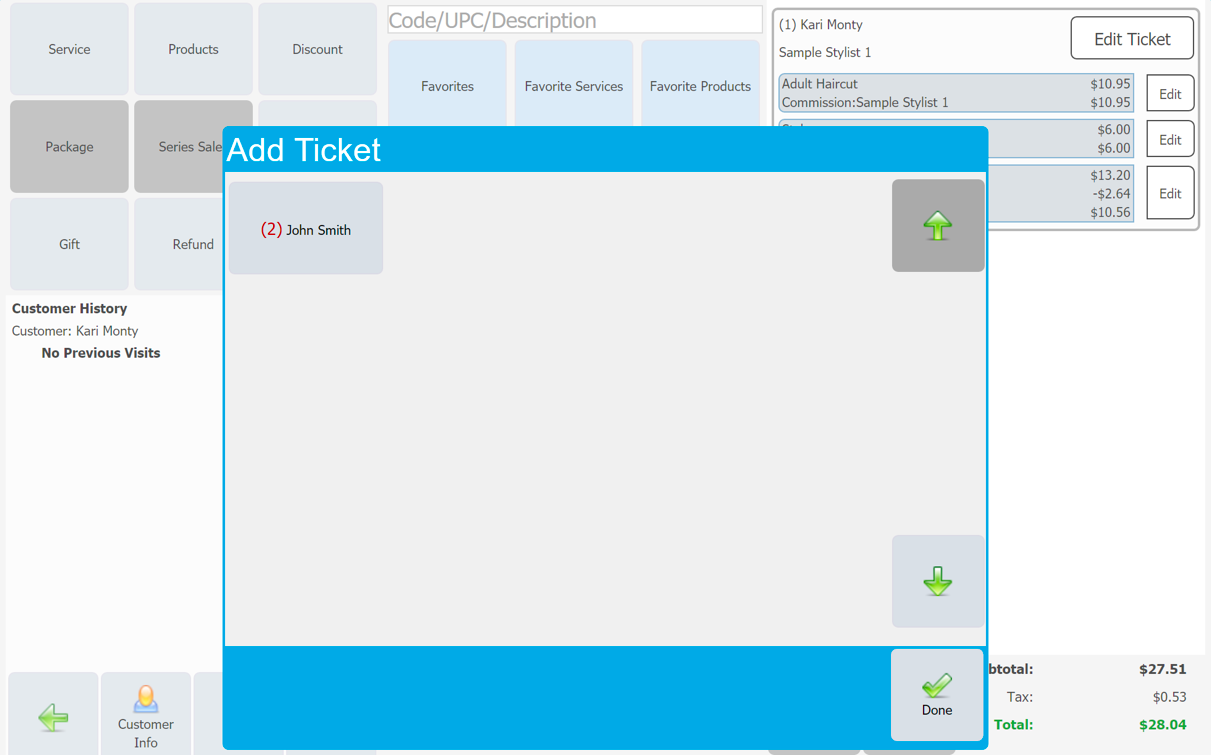
Once the ticket is added the right side of the window will look as below.
6. Once products, services, discounts etc. are all completed it is time to send the ticket to payment by clicking on Send to Payment button on bottom right.
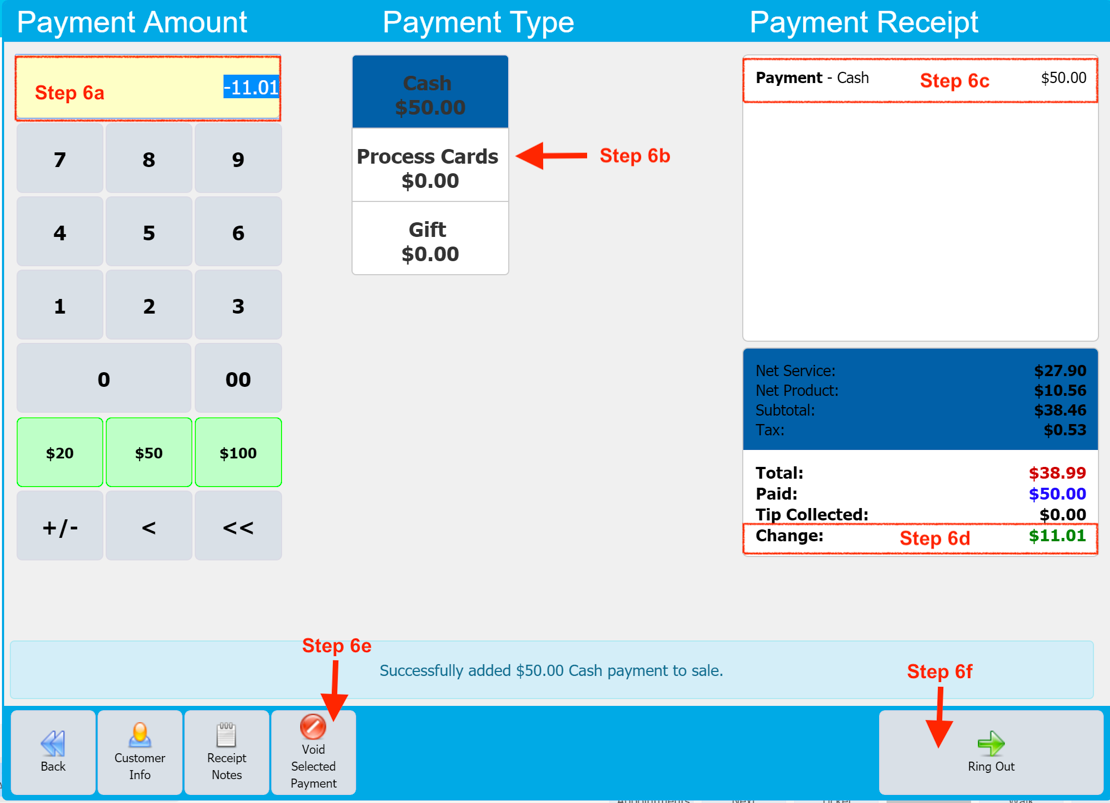
a. In the yellow box on top left enter the cash amount paid by the customer, in this example $40.00. If credit card don’t enter any amount, just go to Step b.
b. Click on the payment type (Cash/Process Cards/Gift)
c. If paid by credit card tell customer to enter Tip if they wish to and enter the Green button on the credit terminal. Verify the payment amount, if customer accidently paid too much ask them if they wanted to pay that much.
d. Look at the Change amount at the bottom of the Payment Receipt section.
e. If required cancel the payment and redo by first highlighting the payment (which will highlight in blue) then press the Void Select Payment button at the bottom middle.
f. If everything is good then click on Ring Out button at the bottom right.
1. In order to close for the night click on the Manager tab from top of the menu
2. Click on Close Out from the left menu
3. Click on Cash from the Select a Helper
4. Click on End-Day Count

5. Click on Open Till to start counting the cash in the register
6. Count each bill and coin and enter the number of each in the Qty column
7. Look at the Over/Short column on top right to see if what the POS is expecting to have cash is same as what is counted. If there is a difference it will show as negative value if short and positive value if over. Recount the money to see if there was any error in counting. If you still cannot figure out the difference then call your manager or owner. For anything shorter than $5 please let your manager know.
8. Final step is to save the count by clicking on Save/Close button bottom right.
Please clock out prior to leaving the salon.